Layout management in Android
last modified December 3, 2012
In this chapter of the Android development tutorial we will talk about layout management. widgets.
When we design the user interface of our application, we decide what components we will use and how we will organise those components in the application. To organise our components, we use specialised non visible objects called layout managers.
There are several layout managers in Android. A LinearLayout lines up its
views in one row or column. A FrameLayout is a simple layout manager used
to display one view. A RelativeLayout is a layout manager in which the
views are positioned in relation to each other or to the parent. The most powerful
layout manager is the GridLayout manager. It arranges the views in a grid.
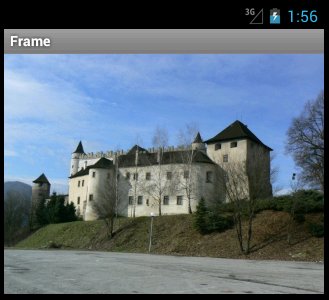
Showing an image with FrameLayout
The first example shows an image using the FrameLayout manager.
$ ls res/drawable-hdpi/
ic_launcher.png  zamok.jpg
Depending on a android virtual device we are using, we put the image in the corresponding subdirectory of the res directory.
<?xml version="1.0" encoding="utf-8"?>
<FrameLayout xmlns:android="http://schemas.android.com/apk/res/android"
    android:layout_gravity="top"
    android:layout_width="wrap_content"
    android:layout_height="wrap_content"
    >

 <ImageView
        android:layout_height="match_parent"
        android:layout_width="match_parent"
        android:src="@drawable/zamok"  />

</FrameLayout>
In the FrameLayout manager, we put one ImageView.
<FrameLayout xmlns:android="http://schemas.android.com/apk/res/android"
    android:layout_gravity="top"
    android:layout_width="wrap_content"
    android:layout_height="wrap_content"
    >
The FrameLayout is big enough to display the ImageView
by setting the layout width and height to wrap_content. It is
pushed to the top using the layout_gravity attribute.
<ImageView
    android:layout_height="match_parent"
    android:layout_width="match_parent"
    android:src="@drawable/zamok"  />
The ImageView displays an image. The image is
located in a subdirectory of the res directory.
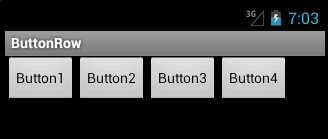
A row of buttons
In the example we create a row of four buttons.
<?xml version="1.0" encoding="utf-8"?>
<LinearLayout xmlns:android="http://schemas.android.com/apk/res/android"
    android:orientation="horizontal"
    android:layout_width="match_parent"
    android:layout_height="match_parent"
    >

  <Button
      android:layout_height="wrap_content"
      android:layout_width="wrap_content"
      android:text="Button1" />

  <Button
      android:layout_height="wrap_content"
      android:layout_width="wrap_content"
      android:text="Button2" />

  <Button
      android:layout_height="wrap_content"
      android:layout_width="wrap_content"
      android:text="Button3" />

  <Button
      android:layout_height="wrap_content"
      android:layout_width="wrap_content"
      android:text="Button4" />

</LinearLayout>
We have a horizontal LinearLayout. In this layout, we
add four buttons.
<LinearLayout xmlns:android="http://schemas.android.com/apk/res/android"
    android:orientation="horizontal"
    android:layout_width="match_parent"
    android:layout_height="match_parent"
    >
We create a horizontal LinearLayout manager. The width and height of the layout match the parent which means that it fills the entire screen.
<Button
    android:layout_height="wrap_content"
    android:layout_width="wrap_content"
    android:text="Button1" />
Each of the four buttons use the wrap_content property. They
are then just big enough to display their content.
A row of buttons II
In the third example of this chapter, we show how to programmatically create
a row of buttons with a LinearLayout manager.
package com.zetcode.btnrow2;

import android.app.Activity;
import android.os.Bundle;
import android.widget.Button;
import android.widget.LinearLayout;

public class ButtonRow2 extends Activity
{
    @Override
    public void onCreate(Bundle savedInstanceState)
    {
        super.onCreate(savedInstanceState);

        initUI();
    }

    public void initUI()
    {
        Button btn1 = new Button(this);
        btn1.setText("Button");

        Button btn2 = new Button(this);
        btn2.setText("Button");

        Button btn3 = new Button(this);
        btn3.setText("Button");

        Button btn4 = new Button(this);
        btn4.setText("Button");

        LinearLayout ll = new LinearLayout(this);
        ll.setOrientation(LinearLayout.HORIZONTAL);

        ll.addView(btn1);
        ll.addView(btn2);
        ll.addView(btn3);
        ll.addView(btn4);

        setContentView(ll);
    }
}
Four buttons are placed in a horizontal LinearLayout. We will not
use the layout XML file in this sample.
Button btn1 = new Button(this);
btn1.setText("Button");
A Button widget is created. The text is set for the button
with the setText() method.
LinearLayout ll = new LinearLayout(this);
ll.setOrientation(LinearLayout.HORIZONTAL);
A horizontal LinearLayout is created.
ll.addView(btn1);
ll.addView(btn2);
ll.addView(btn3);
ll.addView(btn4);
Buttons are added to the layout manager.
setContentView(ll);
The linear layout manager is set to be the content view of the activity.
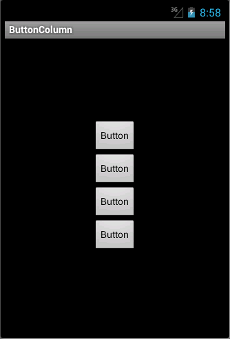
A column of buttons
We use the FrameLayout and the LinearLayout managers to create
a column of buttons centered on the screen.
<?xml version="1.0" encoding="utf-8"?>
<FrameLayout
    xmlns:android="http://schemas.android.com/apk/res/android"
    android:layout_width="wrap_content"
    android:layout_height="wrap_content"
    android:layout_gravity="center"
    >

  <LinearLayout xmlns:android="http://schemas.android.com/apk/res/android"
      android:orientation="vertical"
      android:layout_width="match_parent"
      android:layout_height="match_parent"
      >

      <Button
        android:layout_height="wrap_content"
        android:layout_width="wrap_content"
        android:text="Button" />

      <Button
        android:layout_height="wrap_content"
        android:layout_width="wrap_content"
        android:text="Button" />

      <Button
        android:layout_height="wrap_content"
        android:layout_width="wrap_content"
        android:text="Button" />

      <Button
        android:layout_height="wrap_content"
        android:layout_width="wrap_content"
        android:text="Button" />

  </LinearLayout>

</FrameLayout>
A LinearLayout manager with four buttons is placed in the FrameLayout manager.
<FrameLayout
    xmlns:android="http://schemas.android.com/apk/res/android"
    android:layout_width="wrap_content"
    android:layout_height="wrap_content"
    android:layout_gravity="center"
    >
The FrameLayout does not occupy all the available space. It is just big enough
to take all the four buttons. And therefore we can use the layout_gravity
attribute to center the LinearLayout and its four buttons.
<LinearLayout xmlns:android="http://schemas.android.com/apk/res/android"
    android:orientation="vertical"
    android:layout_width="match_parent"
    android:layout_height="match_parent"
    >
A vertical LinearLayout is created.
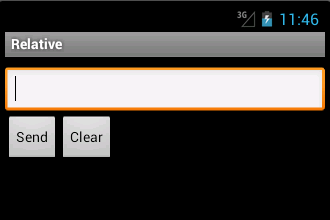
RelativeLayout
RelativeLayout lets child views specify their position relative to the parent
view or to each other. The views are referenced by their ids.
<?xml version="1.0" encoding="utf-8"?>
<RelativeLayout xmlns:android="http://schemas.android.com/apk/res/android"
    android:layout_width="fill_parent"
    android:layout_height="fill_parent"
    >

    <EditText
      android:id="@+id/etId"
      android:layout_marginTop="10dp"
      android:layout_width="match_parent"
      android:layout_height="wrap_content" />

    <Button
      android:id="@+id/btn_sendId"
      android:layout_below="@+id/etId"
      android:layout_width="wrap_content"
      android:layout_height="wrap_content"
      android:text="Send" />

    <Button
      android:id="@+id/btn_clearId"
      android:layout_below="@+id/etId"
      android:layout_toRightOf="@+id/btn_sendId"
      android:layout_width="wrap_content"
      android:layout_height="wrap_content"
      android:text="Clear" />

</RelativeLayout>
The XML code displays an EditText with two buttons.
<EditText
    android:id="@+id/etId"
    android:layout_marginTop="10dp"
    android:layout_width="match_parent"
    android:layout_height="wrap_content" />
The EditText will be stretched from right
to left by setting the android:layout_width to
android:match_parent. The widget will be high enough
to show its contents. We specify some gap between the widget
and the border of the screen with android:layout_marginTop
property.
<Button
    android:id="@+id/btn_sendId"
    android:layout_below="@+id/etId"
    android:layout_width="wrap_content"
    android:layout_height="wrap_content"
    android:text="Send" />
The Send button widget will be placed below the EditText widget.
To accomplish this, we use the android:layout_below property.
Note that we reference the id of the widget that we relate to.
<Button
    android:id="@+id/btn_clearId"
    android:layout_below="@+id/etId"
    android:layout_toRightOf="@+id/btn_sendId"
    android:layout_width="wrap_content"
    android:layout_height="wrap_content"
    android:text="Clear" />
The Clear button is placed below the EditText widget and to the right
of the Send button. We accomplish this by two properties. The
android:layout_below and the android:layout_toRightOf
property.
Grid
A GridLayout manager places its children in a rectangular grid.
The grid consists of row and columns. The intersections of rows and columns
are cells. Each cell is referenced by its index. A view in a grid can occupy one or
more cells. The gravity is a property that specifies how a view should be
placed in its group of cells.
<?xml version="1.0" encoding="utf-8"?>
<GridLayout xmlns:android="http://schemas.android.com/apk/res/android"
    android:layout_width="match_parent"
    android:layout_height="match_parent"
    >

    <Button
      android:text="(0, 0)"
      android:layout_row="0"
      android:layout_column="0" />

    <Button
      android:layout_row="0"
      android:layout_column="1"
      android:layout_columnSpan="2"
      android:layout_gravity="fill_horizontal" />

    <Button
      android:text="(0, 3)"
      android:layout_row="0"
      android:layout_column="3" />

    <Button
      android:text="(0, 4)"
      android:layout_row="0"
      android:layout_column="4" />

    <Button
      android:layout_row="1"
      android:layout_column="0"
      android:layout_rowSpan="3"
      android:layout_columnSpan="5"
      android:layout_gravity="fill" />

    <Button
      android:text="Center"
      android:layout_row="4"
      android:layout_column="0"
      android:layout_columnSpan="5"
      android:layout_gravity="center_horizontal" />

    <Button
      android:text="Right"
      android:layout_row="5"
      android:layout_column="0"
      android:layout_columnSpan="5"
      android:layout_gravity="right" />

</GridLayout>
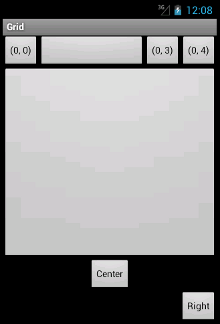
In the example we put a few buttons in a GridLayout. We show how a button can stretch over several cells.
<Button
    android:text="(0, 0)"
    android:layout_row="0"
    android:layout_column="0" />
Using the layout_row and layout_column properties, we place
a button at top-left cell. The indeces start from zero.
<Button
    android:layout_row="0"
    android:layout_column="1"
    android:layout_columnSpan="2"
    android:layout_gravity="fill_horizontal" />
This button will span two columns. The layout_gravity property
will cause the button to fill the two columns.
<Button
    android:layout_row="1"
    android:layout_column="0"
    android:layout_rowSpan="3"
    android:layout_columnSpan="5"
    android:layout_gravity="fill" />
This button will span three rows and five columns.
<Button
    android:text="Center"
    android:layout_row="4"
    android:layout_column="0"
    android:layout_columnSpan="5"
    android:layout_gravity="center_horizontal" />
A view may not occupy all the space that was allotted to it. This button is horizontally centered within five columns.
In this chapter of the Android development tutorial we worked with layout management.