First Android application
last modified December 5, 2012
In this chapter of the Android development tutorial we will create our first Android application.
The application will just display a message on the screen.
$ mkdir First
$ cd First/
We create a First directory and make it the current working
directory.
$ android create project --target android-17 --name First \
> --path . --activity MainActivity --package com.zetcode.first
Created directory /home/janbodnar/programming/android/First/src/com/zetcode/first
Added file ./src/com/zetcode/first/MainActivity.java
Created directory /home/janbodnar/programming/android/First/res
Created directory /home/janbodnar/programming/android/First/bin
...
We create a new Android project with the android create project command.
The target option specifies the Android application framework version. The name
option determines the name of the project. The path is the location of our project
directory. The activity is the name of our default activity. Finally, the
package is the name of the package namespace for our project.
The command creates a Java file for the main activity, several directories, and
XML files.
$ ls
AndroidManifest.xml  bin        libs              proguard-project.txt  res
ant.properties       build.xml  local.properties  project.properties    src
These are the files and directories created by the android create project
command. The AndroidManifest.xml file describes the fundamental characteristics
of the application. The source files of the application reside in the src directory.
In the res directory, we have the application's resource files. The Android application
archive file will be created in the bin directory. The libs directory is used
to store additional libraries. The ant.properties and build.xml files
are the Ant files used to build the project. Finally, the local.properties and
the project.properties are property files of the Android project.
<?xml version="1.0" encoding="utf-8"?>
<manifest xmlns:android="http://schemas.android.com/apk/res/android"
      package="com.zetcode.first"
      android:versionCode="1"
      android:versionName="1.0">
   <application android:label="@string/app_name"
                   android:icon="@drawable/ic_launcher">
       <activity android:name="MainActivity"
                 android:label="@string/app_name">
           <intent-filter>
               <action android:name="android.intent.action.MAIN" />
               <category android:name="android.intent.category.LAUNCHER" />
           </intent-filter>
       </activity>
   </application>
</manifest>
This is the project manifest file. It describes some basic characteristics of the Android project.
The file provides the package name, which is com.zetcode.com in our case.
It contains the name of the default activity. The @string/app_name and
@drawable/ic_launcher are resource values. The string resource values are set
from the strings.xml file located in the res/values subdirectory.
The image resources are located in the drawable subdirectories
of the res directory. The <intent-filter> element of the main activity declares
its capabilities. It specifies what the activity can do. The two intents specify that the
activity is a main entry point of the application, it can be the initial activity of a task
and is listed in the top-level application launcher.
<?xml version="1.0" encoding="utf-8"?>
<resources>
    <string name="app_name">First program</string>
    <string name="messsage">First Android program</string>
</resources>
In the strings.xml file we have one element which defines the resource value
referenced from the AndroidManifest.xml file. The file is located in the
res/values subdirectory. We change the value of the first element
(from 'MainActivity' to 'First program'). The name of the application is shown in the list
of the applications in the emulator. We add the second element. It
is referenced from the main.xml file.
<?xml version="1.0" encoding="utf-8"?>
<LinearLayout xmlns:android="http://schemas.android.com/apk/res/android"
    android:orientation="vertical"
    android:layout_width="fill_parent"
    android:layout_height="fill_parent"
    >
<TextView
    android:layout_width="fill_parent"
    android:layout_height="wrap_content"
    android:text="@string/message"
    />
</LinearLayout>
This is the main.xml file located in the res/layout subdirectory.
It defines the layout of an Activity. The application loads the layout for an
Activity in the onCreate() method. In our case we have a
vertical linear layout with one TextView widget.
package com.zetcode.first;

import android.app.Activity;
import android.os.Bundle;

public class MainActivity extends Activity
{
    /** Called when the activity is first created. */
    @Override
    public void onCreate(Bundle savedInstanceState)
    {
        super.onCreate(savedInstanceState);
        setContentView(R.layout.main);
    }
}
This is the MainActivity.java source file. When the activity is first
created the onCreate() method is called. The method loads the activity
layout defined in the main.xml file.
Building the application
We use the ant tool to build the Android application.
$ ant debug
We execute the ant debug command in the project root directory.
There are two build targets. Debug and release. We will use the debug build
target. The release build needs some additional work with signing.
$ ant debug install
It is possible to build and install the application in one step using the
ant debug install command.
$ ls -1 bin
AndroidManifest.xml
AndroidManifest.xml.d
build.prop
classes
classes.dex
classes.dex.d
First.ap_
First.ap_.d
First-debug.apk
First-debug-unaligned.apk
First-debug-unaligned.apk.d
jarlist.cache
proguard.txt
res
The final Android package is created in the bin directory. The name of our
archive file is First-debug.apk.
Running the application
We install the application to the emulator and start it from it.
$ emulator -avd AVD2 &
The emulator is started with a specific android virtual device.
$ adb install bin/First-debug.apk
The adb install command installs the application on the emulator.

We did not use a custom icon, so the built-in icon is used. From the applications list we select the First program application. The application is launched.

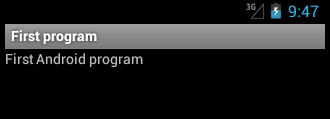
We can see the message that we have specified in the strings.xml file.
This chapter was an introduction Android application development.