Tcl/Tk widgets
last modified October 18, 2023
In this part of the Tcl/Tk tutorial, we cover
some basic Tk widgets. We have an example for a
checkbutton, label, scale
and listbox widgets.
Widgets are basic building blocks of a GUI application. Over the years, several widgets became a standard in all toolkits on all OS platforms. For example a button, a check box or a scroll bar. Some of them might have a different name. For instance, a check box is called a check button in Tk. Tk has a small set of widgets which cover the basic programming needs. More specialised widgets can be created as custom widgets.
Checkbutton
The checkbutton is a widget that has two states: on and off.
The on state is visualised by a check mark. It is used to denote some boolean property.
The checkbutton widget provides a check box with a text label.
#!/usr/bin/wish

# ZetCode Tcl/Tk tutorial
#
# This program toggles the title of the
# window with the checkbutton widget.
#
# Author: Jan Bodnar
# Website: www.zetcode.com


frame .fr
pack .fr -fill both -expand 1
checkbutton .fr.cb -text "Show title" -command onClick  \
    -onvalue true -offvalue false -variable selected
.fr.cb select
place .fr.cb -x 50 -y 50

proc onClick {} {

    global selected

    if {$selected==true} {

        wm title . checkbutton
    } else {
        wm title . ""
    }
}


wm title . checkbutton
wm geometry . 350x250+300+300
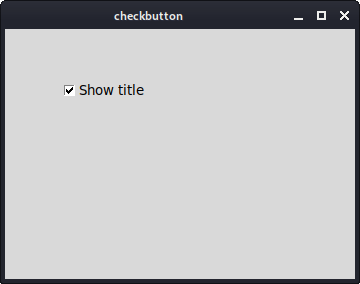
In our example, we place a check button on the window. The check button shows/hides the title of the window.
checkbutton .fr.cb -text "Show title" -command onClick  \
    -onvalue true -offvalue false -variable selected
The checkbutton command creates a checkbutton widget. The -text
option specifies the text which is displayed by the widget. When we click
on the widget, the onClick procedure is executed. When the checkbutton
is checked the selected variable has true value. Otherwise it has false value.
.fr.cb select
Initially, the title is shown in the titlebar. So at the start, we make the widget
checked with the select command.
place .fr.cb -x 50 -y 50
We place the checkbutton widget on the frame at x=50 and y=50 coordinates.
if {$selected==true} {

    wm title . checkbutton
} else {
    wm title . ""
}
Inside the onClick procedure, we display or hide the title based on
the selected variable.
Label
The label widget is used to display text or images.
No user interaction is available.
sudo apt-get install libtk-img
In order to run this example, we must install libtk-img package.
#!/usr/bin/wish

# ZetCode Tcl/Tk tutorial
#
# In this script, we use a label
# widget to show an image.
#
# Author: Jan Bodnar
# Website: www.zetcode.com

package require Img


frame .fr
pack .fr
image create photo img -file "tatras.jpg"
label .fr.lbl -image img
pack .fr.lbl

wm title . label
wm geometry . +300+300
Our example shows an image on the window.
package require Img
By default, the label widget can display only a limited
set of image types. To display a JPG image, we must use an Img package.
image create photo img -file "tatras.jpg"
We create a photo image from the image on the file system.
label .fr.lbl -image img
The photoimage is given to the image parameter of the
label widget.
pack .fr.lbl
The image is packed into the frame.
wm geometry . +300+300
We specify the x and y coordinates. These are used to position a window on the screen. We omit the size of the window. The pack manager will set the window size to the size of the image.
Scale
A scale is a widget that lets the user graphically select a value by
sliding a knob within a bounded interval. Our example will show a selected number
in a label widget.
#!/usr/bin/wish

# ZetCode Tcl/Tk tutorial
#
# In this script, we show how to
# use the scale widget.
#
# Author: Jan Bodnar
# Website: www.zetcode.com


frame .fr
pack .fr -fill both -expand 1

scale .fr.scl -orient horizontal -from 0 -to 100 \
    -length 150  -variable val -showvalue 0
place .fr.scl -x 50 -y 50

label .fr.lbl -textvariable val
place .fr.lbl -x 80 -y 110

wm title . scale
wm geometry . 350x250+300+300
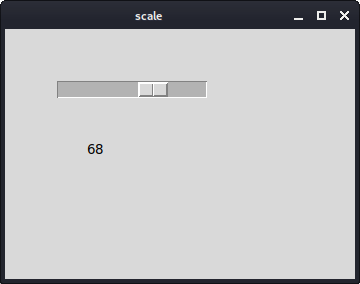
We have two widgets in the above script. A scale and a label. A value from the scale widget is shown in the label widget.
scale .fr.scl -orient horizontal -from 0 -to 100 \
    -length 150  -variable val -showvalue 0
scale widget is created. The -orient option
makes the widget horizontal. We provide the lower and upper
bounds with the -from and -to options. The currently
selected number is stored in the val variable. By default the scale widget shows
also the selected number. With the -showvalue option, we hide it.
label .fr.lbl -textvariable val
A label widget is created. It will display the
beforementioned val variable.
Listbox
listbox is a widget that displays a list of objects. It allows the user
to select one or more items.
#!/usr/bin/wish

# ZetCode Tcl/Tk tutorial
#
# In this script, we show how to
# use the listbox widget.
#
# Author: Jan Bodnar
# Website: www.zetcode.com


frame .fr
pack .fr -fill both -expand 1

listbox .fr.lb
.fr.lb insert end "Scarlett Johansson" "Rachel Weiss" "Winona Ryder" \
    "Jessica Alba"

bind .fr.lb <<ListboxSelect>> { setLabel [%W curselection]}

place .fr.lb -x 20 -y 20

label .fr.lbl
place .fr.lbl -x 20 -y 210

wm title . listbox
wm geometry . 350x250+300+300

proc setLabel { idx } {

    set val [.fr.lb get $idx]
    .fr.lbl configure -text $val

}
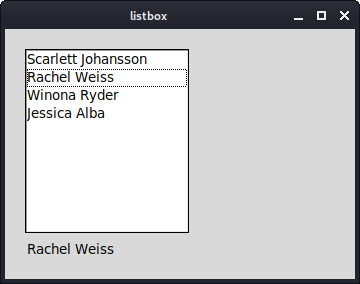
In our example, we show a list of actresses in the listbox.
The currently selected actress is displayed in a label widget.
listbox .fr.lb
A listbox widget is created with the listbox command.
.fr.lb insert end "Scarlett Johansson" "Rachel Weiss" "Winona Ryder" \
    "Jessica Alba"
Here we insert four actresses to the widget.
bind .fr.lb <<ListboxSelect>> { setLabel [%W curselection]}
When we select an item in the listbox, the <<ListboxSelect>>
event is generated. We bind the setLabel procedure to this event.
We also send a parameter to the procedure. The index of the currently
selected value. The %W curselection returns the index.
The %W is a handler for the widget in question and the
curselection is a command executed on this widget.
proc setLabel { idx } {

    set val [.fr.lb get $idx]
    .fr.lbl configure -text $val

}
In the setLabel procedure we find out the value based on the index that we have obtained. This value is later shown in the label widget.
In this part of the Tcl/Tk tutorial, we have presented several Tk widgets.