First programs in GTK+
last modified October 18, 2023
In this part of the GTK+ programming tutorial, we create our first programs in GTK+. We center a window on the screen, show an icon in the titlebar, display a small tooltip, and create a mnemonic for a button widget.
Simple example
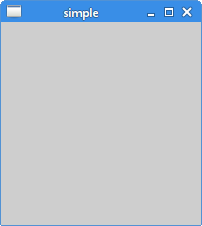
Our first example shows a basic window.
#include <gtk/gtk.h>

int main(int argc, char *argv[]) {

  GtkWidget *window;

  gtk_init(&argc, &argv);

  window = gtk_window_new(GTK_WINDOW_TOPLEVEL);
  gtk_widget_show(window);

  g_signal_connect(window, "destroy",
      G_CALLBACK(gtk_main_quit), NULL);

  gtk_main();

  return 0;
}
This example shows a basic window on the screen.
GtkWidget *window;
GtkWidget is the base class that all widgets in GTK+ derive from.
It manages the widget lifecycle, states, and style.
gtk_init(&argc, &argv);
The gtk_init function initializes GTK+ and parses some standard
command line options. This function must be called before using any other GTK+
functions.
window = gtk_window_new(GTK_WINDOW_TOPLEVEL);
The gtk_window_new function creates a new GtkWindow,
which is a toplevel window that can contain other widgets.
The window type is GTK_WINDOW_TOPLEVEL; toplevel windows have a
titlebar and a border. They are managed by the window manager.
gtk_widget_show(window);
The get_widget_show flags a widget to be displayed. Any widget
that is not shown will not appear on the screen.
g_signal_connect(window, "destroy",
    G_CALLBACK(gtk_main_quit), NULL);
The g_signal_connect function connects a callback function
to a signal for a particular object. The window does not react to the
destroy signal by default. We must explicitly terminate the application
by connecting the destroy signal to the built-in
gtk_main_quit function, which terminates the application.
gtk_main();
This code enters the GTK+ main loop. From this point, the application sits and waits for events to happen.
$ gcc -o simple simple.c `pkg-config --libs --cflags gtk+-2.0`
This is how we compile the example.
Centering the window
If we do not position the window ourselves, the window manager will position it for us. In the next example, we center the window.
#include <gtk/gtk.h>

int main(int argc, char *argv[]) {

  GtkWidget *window;

  gtk_init(&argc, &argv);

  window = gtk_window_new(GTK_WINDOW_TOPLEVEL);
  gtk_window_set_title(GTK_WINDOW(window), "Center");
  gtk_window_set_default_size(GTK_WINDOW(window), 230, 150);
  gtk_window_set_position(GTK_WINDOW(window), GTK_WIN_POS_CENTER);
  gtk_widget_show(window);

  g_signal_connect(G_OBJECT(window), "destroy",
      G_CALLBACK(gtk_main_quit), NULL);

  gtk_main();

  return 0;
}
In the example, we center the window, set a title, and size the window.
gtk_window_set_title(GTK_WINDOW(window), "Center");
The gtk_window_set_title function sets a window title.
If we do not set a title ourselves, the GTK+ will use a name of a source file as a title.
gtk_window_set_default_size(GTK_WINDOW(window), 230, 150);
This gtk_window_set_default_size sets the size of the window to
230x150. Note that we are talking about the client area, excluding the decorations
provided by the window manager.
gtk_window_set_position(GTK_WINDOW(window), GTK_WIN_POS_CENTER);
Passing the GTK_WIN_POS_CENTER constant to the gtk_window_set_position
function centers the program on the screen.
The application icon
In the next example, we show the application icon. Most window managers display the icon in the left corner of the titlebar and also on the taskbar.
#include <gtk/gtk.h>

GdkPixbuf *create_pixbuf(const gchar * filename) {

   GdkPixbuf *pixbuf;
   GError *error = NULL;
   pixbuf = gdk_pixbuf_new_from_file(filename, &error);

   if (!pixbuf) {

      fprintf(stderr, "%s\n", error->message);
      g_error_free(error);
   }

   return pixbuf;
}

int main(int argc, char *argv[]) {

  GtkWidget *window;
  GdkPixbuf *icon;

  gtk_init(&argc, &argv);

  window = gtk_window_new(GTK_WINDOW_TOPLEVEL);
  gtk_window_set_title(GTK_WINDOW(window), "Icon");
  gtk_window_set_default_size(GTK_WINDOW(window), 230, 150);
  gtk_window_set_position(GTK_WINDOW(window), GTK_WIN_POS_CENTER);

  icon = create_pixbuf("web.png");
  gtk_window_set_icon(GTK_WINDOW(window), icon);

  gtk_widget_show(window);

  g_signal_connect(G_OBJECT(window), "destroy",
      G_CALLBACK(gtk_main_quit), NULL);

  g_object_unref(icon);

  gtk_main();

  return 0;
}
The code example shows an application icon.
pixbuf = gdk_pixbuf_new_from_file(filename, &error);
The gdk_pixbuf_new_from_file function creates a new pixbuf by
loading an image from a file. The file format is detected automatically.
If NULL is returned, then an error will be set.
if (!pixbuf) {

    fprintf(stderr, "%s\n", error->message);
    g_error_free(error);
}
An error message is printed if the icon could not be loaded.
icon = create_pixbuf("web.png");
gtk_window_set_icon(GTK_WINDOW(window), icon);
The gtk_window_set_icon displays the
icon for the window. The create_pixbuf creates
a GdkPixbuf from a PNG file.
g_object_unref(icon);
The g_object_unref decreases the reference count of the pixbuf object.
When its reference count drops to 0, the object is finalized (i.e. its memory is freed).
Tooltip
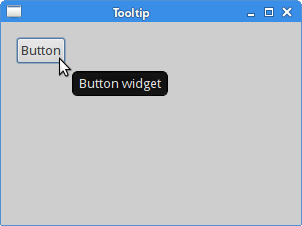
A tooltip is a small rectangular window, which gives a brief information about an object. It is usually a GUI component; it is part of the help system of the application.
#include <gtk/gtk.h>

int main(int argc, char *argv[]) {

  GtkWidget *window;
  GtkWidget *button;
  GtkWidget *halign;

  gtk_init(&argc, &argv);

  window = gtk_window_new(GTK_WINDOW_TOPLEVEL);
  gtk_window_set_title(GTK_WINDOW(window), "Tooltip");
  gtk_window_set_default_size(GTK_WINDOW(window), 300, 200);
  gtk_container_set_border_width(GTK_CONTAINER(window), 15);

  button = gtk_button_new_with_label("Button");
  gtk_widget_set_tooltip_text(button, "Button widget");

  halign = gtk_alignment_new(0, 0, 0, 0);
  gtk_container_add(GTK_CONTAINER(halign), button);
  gtk_container_add(GTK_CONTAINER(window), halign);

  gtk_widget_show_all(window);

  g_signal_connect(G_OBJECT(window), "destroy",
      G_CALLBACK(gtk_main_quit), NULL);

  gtk_main();

  return 0;
}
The example shows a basic tooltip on a button widget.
gtk_container_set_border_width(GTK_CONTAINER(window), 15);
The gtk_container_set_border_width sets some border space
around the edges of the window.
gtk_widget_set_tooltip_text(button, "Button widget");
The gtk_widget_set_tooltip_text sets a basic tooltip
for the given widget.
halign = gtk_alignment_new(0, 0, 0, 0);
gtk_container_add(GTK_CONTAINER(halign), button);
The GtkAlignment is a basic container which can be
used to align its child to the sides of the window. In our case,
the button is placed to the upper-left corner of the window.
The first parameters of the function are the xalign and yalign.
A value of 0 for xalign indicates left alignment; a value of
0 for yalign indicates top alignment. The third and fourth parameters
are scaling values. Passing 0 to both parameters indicates that
the widget does not expand in both directions.
gtk_container_add(GTK_CONTAINER(window), halign);
The GtkAlignment is set to be the main container of
the window.
gtk_widget_show_all(window);
When we are dealing with multiple widgets, it is easier to
call gtk_widget_show_all on the container than individually
showing all widgets. In our case, both the window and the button are
shown in one shot.
Mnemonic
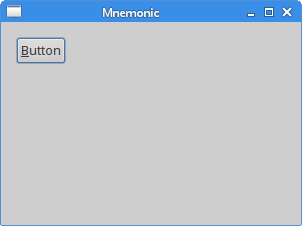
Mnemonics are shortcut keys that activate a widget that supports mnemonics. They can be used with labels, buttons, or menu items. The mnemonic is created by adding the _ character to the widget's label. It causes the next character to be the mnemonic. The character is combined with the mouseless modifier, usually Alt. The chosen character is underlined, but it may be emphasized in a platform specific manner. On some platforms, the character is only underlined after pressing the mouseless modifier.
#include <gtk/gtk.h>

void print_msg(GtkWidget *widget, gpointer window) {

  g_printf("Button clicked\n");
}

int main(int argc, char *argv[]) {

  GtkWidget *window;
  GtkWidget *button;
  GtkWidget *halign;

  gtk_init(&argc, &argv);

  window = gtk_window_new(GTK_WINDOW_TOPLEVEL);
  gtk_window_set_title(GTK_WINDOW(window), "Mnemonic");
  gtk_window_set_default_size(GTK_WINDOW(window), 300, 200);
  gtk_container_set_border_width(GTK_CONTAINER(window), 15);

  button = gtk_button_new_with_mnemonic("_Button");

  g_signal_connect(button, "clicked",
      G_CALLBACK(print_msg), NULL);

  halign = gtk_alignment_new(0, 0, 0, 0);
  gtk_container_add(GTK_CONTAINER(halign), button);
  gtk_container_add(GTK_CONTAINER(window), halign);

  gtk_widget_show_all(window);

  g_signal_connect(G_OBJECT(window), "destroy",
      G_CALLBACK(gtk_main_quit), NULL);

  gtk_main();

  return 0;
}
We set a mnemonic for a button widget. It can be activated with the Alt+B keyboard shortcut.
button = gtk_button_new_with_mnemonic("_Button");
The gtk_button_new_with_mnemonic function creates a new GtkButton
containing a label. If characters in label are preceded by an underscore, they are underlined.
g_signal_connect(button, "clicked",
    G_CALLBACK(print_msg), NULL);
When we fire the button, a message is printed to the console. With the g_signal_connect
function, we connect a clicked signal to the print_msg function.
At this moment, there are three ways to activate the button: a left mouse button click, the Alt+B shortcut, and the Space key (provided the button has the focus).
In this chapter we have created some simple GTK+ programs.