PyQt QWebEngineView
last modified August 24, 2023
In this article we show how to work with QWebEngineView.
Sources are available at PyQt-Examples repository. Visit Advanced PyQt5 e-book, read PyQt5 tutorial, or list all PyQt tutorials.
PyQt QWebEngineView
QWebEngineView is the main widget component of the Qt WebEngine web
browsing module. It is used to display web content. The page
function returns a reference to a web page object.
The QWebEnginePage provides an object to view and edit web documents.
The qtwebengine must be installed separately.
$ sudo apt install python3-pyqt5.qtwebengine
This command installs qtwebengine on a Debian-based Linux.
$ sudo pip install pyqtwebengine
The qtwebengine installed via pip tool.
PyQt QWebEngineView simple example
The QWebEngineView's setHtml sets the content of the
web view to the specified HTML content.
<!DOCTYPE html>
<html lang="en">
<head>
    <meta charset="UTF-8">
    <meta name="viewport" content="width=device-width, initial-scale=1.0">
    <title>Home page</title>
</head>
<body>
    <p>
        This is a simple HTML page.
    </p>
</body>
</html>
We use this simple HTML document to display.
#!/usr/bin/python

import sys
from PyQt5.QtWidgets import QWidget, QApplication, QVBoxLayout
from PyQt5.QtWidgets import QApplication
from PyQt5.QtWebEngineWidgets import QWebEngineView


class Example(QWidget):

    def __init__(self):
        super().__init__()

        self.initUI()

    def initUI(self):

        vbox = QVBoxLayout(self)

        self.webEngineView = QWebEngineView()
        self.loadPage()

        vbox.addWidget(self.webEngineView)

        self.setLayout(vbox)

        self.setGeometry(300, 300, 350, 250)
        self.setWindowTitle('QWebEngineView')
        self.show()

    def loadPage(self):

        with open('test.html', 'r') as f:

            html = f.read()
            self.webEngineView.setHtml(html)

def main():

    app = QApplication(sys.argv)
    ex = Example()
    sys.exit(app.exec_())


if __name__ == '__main__':
    main()
In the example, we display a simpe HTML document in a PyQt5 application.
self.webEngineView = QWebEngineView()
The QWebEngineView is created.
def loadPage(self):

    with open('test.html', 'r') as f:

        html = f.read()
        self.webEngineView.setHtml(html)
We open the HTML document and set the content of the document to the web view
with setHtml.

PyQt QWebEngineView export to PDF
The printToPdf function exports the web page to PDF file.
#!/usr/bin/python

import sys
from PyQt5.QtWidgets import (QHBoxLayout, QPushButton, QWidget,
    QApplication, QVBoxLayout, QMessageBox)
from PyQt5.QtWidgets import QApplication
from PyQt5.QtWebEngineWidgets import QWebEngineView


class Example(QWidget):

    def __init__(self):
        super().__init__()

        self.initUI()

    def initUI(self):

        vbox = QVBoxLayout(self)
        hbox = QHBoxLayout()

        self.webEngineView = QWebEngineView()
        self.loadPage()

        expBtn = QPushButton('Export', self)
        expBtn.clicked.connect(self.onClicked)

        hbox.addWidget(expBtn)

        vbox.addWidget(self.webEngineView)
        vbox.addLayout(hbox)
        self.setLayout(vbox)

        self.setGeometry(300, 300, 350, 250)
        self.setWindowTitle('QWebEngineView')
        self.show()

    def onClicked(self):

        self.webEngineView.page().printToPdf('myfile.pdf')
        QMessageBox.information(self, 'info', 'page exported')

    def loadPage(self):

        with open('test.html', 'r') as f:

            html = f.read()
            self.webEngineView.setHtml(html)

def main():

    app = QApplication(sys.argv)
    ex = Example()
    sys.exit(app.exec_())


if __name__ == '__main__':
    main()
In the example, we export the current web page to a PDF file and save it in the current working directory.
self.webEngineView.page().printToPdf('myfile.pdf')
We get the reference to the current page with the page function
and export it and save it with the printToPdf function.
PyQt QWebEngineView back and forward
In the following example, we implement the back and forward buttons.
The canGoBack and canGoForward tell us if there
are prior and subsequent session history entries.
#!/usr/bin/python

import sys
from PyQt5.QtCore import QUrl
from PyQt5.QtGui import QIcon
from PyQt5.QtWidgets import (QApplication, QLineEdit, QMainWindow,
    QPushButton, QToolBar)
from PyQt5.QtWebEngineWidgets import QWebEnginePage, QWebEngineView


class Example(QMainWindow):

    def __init__(self):
        super(Example, self).__init__()

        self.initUI()


    def initUI(self):

        self.toolBar = QToolBar(self)
        self.addToolBar(self.toolBar)

        self.backBtn = QPushButton(self)
        self.backBtn.setEnabled(False)

        self.backBtn.setIcon(QIcon(':/qt-project.org/styles/commonstyle/images/left-32.png'))
        self.backBtn.clicked.connect(self.back)
        self.toolBar.addWidget(self.backBtn)

        self.forBtn = QPushButton(self)
        self.forBtn.setEnabled(False)
        self.forBtn.setIcon(QIcon(':/qt-project.org/styles/commonstyle/images/right-32.png'))

        self.forBtn.clicked.connect(self.forward)
        self.toolBar.addWidget(self.forBtn)

        self.address = QLineEdit(self)
        self.address.returnPressed.connect(self.load)
        self.toolBar.addWidget(self.address)

        self.webEngineView = QWebEngineView(self)
        self.setCentralWidget(self.webEngineView)

        self.webEngineView.page().urlChanged.connect(self.onLoadFinished)

        self.webEngineView.page().titleChanged.connect(self.setWindowTitle)
        self.webEngineView.page().urlChanged.connect(self.urlChanged)

        self.setGeometry(300, 300, 500, 400)
        self.setWindowTitle('QWebEnginePage')
        self.show()

    def onLoadFinished(self):

        if self.webEngineView.history().canGoBack():
            self.backBtn.setEnabled(True)
        else:
            self.backBtn.setEnabled(False)

        if self.webEngineView.history().canGoForward():
            self.forBtn.setEnabled(True)
        else:
            self.forBtn.setEnabled(False)


    def load(self):

        url = QUrl.fromUserInput(self.address.text())

        if url.isValid():
            self.webEngineView.load(url)

    def back(self):
        self.webEngineView.page().triggerAction(QWebEnginePage.Back)

    def forward(self):
        self.webEngineView.page().triggerAction(QWebEnginePage.Forward)

    def urlChanged(self, url):
        self.address.setText(url.toString())


def main():

    app = QApplication(sys.argv)
    ex = Example()
    sys.exit(app.exec_())


if __name__ == '__main__':
    main()
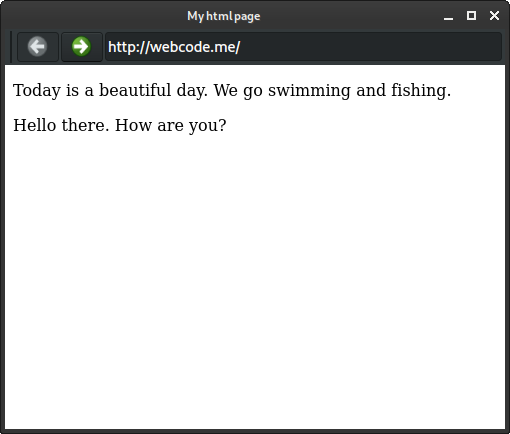
We have a toolbar with back and forward buttons. Next to the buttons there is the address bar. A web page is loaded when we enter its address into the address bar.
self.backBtn = QPushButton(self)
self.backBtn.setEnabled(False)
At first, there are no items in history; therefore, the buttons are disabled.
self.address = QLineEdit(self)
self.address.returnPressed.connect(self.load)
self.toolBar.addWidget(self.address)
Upon pressing the Enter/Return key, we load the page in the address bar.
The address bar is a QLineEdit.
self.webEngineView.page().urlChanged.connect(self.onLoadFinished)
After the page is loaded, we check if there are some items in the history and enable or disable the buttons accordingly.
self.webEngineView.page().titleChanged.connect(self.setWindowTitle)
This line updates the window title to the title of the web page.
self.webEngineView.page().urlChanged.connect(self.urlChanged)
When we go back or forward in history, we make sure that the address bar is updated.
def onLoadFinished(self):

    if self.webEngineView.history().canGoBack():
        self.backBtn.setEnabled(True)
    else:
        self.backBtn.setEnabled(False)

    if self.webEngineView.history().canGoForward():
        self.forBtn.setEnabled(True)
    else:
        self.forBtn.setEnabled(False)
The onLoadFinished checks if we can go back or forward in history.
The buttons are enabled/disabled accordingly.
def load(self):

    url = QUrl.fromUserInput(self.address.text())

    if url.isValid():
        self.webEngineView.load(url)
In the load function, we grab the web page from the address bar
and check if the page is a valid URL. If it is valid, the page is loaded
with the QWebEngineView's load function.
def back(self):
    self.webEngineView.page().triggerAction(QWebEnginePage.Back)
To go backward, we trigger the QWebEnginePage.Back action.
def forward(self):
    self.webEngineView.page().triggerAction(QWebEnginePage.Forward)
To go forward, we trigger the QWebEnginePage.Forward action.

In this article we have presented the PyQt QWebEngineView.
Author
List all PyQt tutorials.