First steps in UI
last modified October 18, 2023
In this part of the Windows API tutorial, we create some simple UI examples.
Simple program
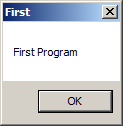
Here is a very simple program. It will pop up a small dialog box.
#include <windows.h>

int WINAPI wWinMain(HINSTANCE hInstance, HINSTANCE hPrevInstance,
                    PWSTR pCmdLine, int CmdShow) {

    MessageBoxW(NULL, L"First Program", L"First", MB_OK);

    return 0;
}
A small dialog box is shown on the screen. It has a caption, a message, and an OK button.
#include <windows.h>
We include the basic function declarations, constants, data types, and structures.
int WINAPI wWinMain(HINSTANCE hInstance, HINSTANCE hPrevInstance,
                    PWSTR pCmdLine, int CmdShow)
The wWinMain function is an entry point to our application.
MessageBoxW(NULL, L"First Program", L"First", MB_OK);
The MessageBoxW function displays a simple message box. The first
parameter is the owner window. In our case, the dialog box has no owner.
The next two parameters provide the message text and the caption. The last
parameter defines the message dialog type. The MB_OK value causes
the dialog to have one OK button.
Centering a window
In the next code example, we center the window on the screen.
The SetWindowPos function changes the size, position,
and Z order of a child, a pop-up, or a top-level window.
BOOL WINAPI SetWindowPos(HWND hWnd, HWND hWndInsertAfter, int x, int y,
    int cx, int cy, UINT uFlags);
The first parameter is a handle to the window. The second parameter is
a handle to the window to precede the positioned window in the Z order
or a special flag; for instance, the HWND_BOTTOM flag places
the window at the bottom of the Z order and the HWND_TOP
flag at the top of the Z order. The x and y
parameters are the new positions of the left and top sides of the window,
in client coordinates. The cx and cy are
the new width and height dimensions of the window, in pixels.
The last parameter is a combination of sizing and positioning flags;
for instance SWP_NOMOVE retains the current position
(ignores x and y parameters) or SWP_NOSIZE
retains the current size (ignores cx and cy parameters).
#include <windows.h>

LRESULT CALLBACK WndProc(HWND, UINT, WPARAM, LPARAM);
void CenterWindow(HWND);

int WINAPI wWinMain(HINSTANCE hInstance, HINSTANCE hPrevInstance,
                    PWSTR pCmdLine, int nCmdShow) {

    MSG  msg;
    WNDCLASSW wc = {0};
    wc.lpszClassName = L"Center";
    wc.hInstance     = hInstance;
    wc.hbrBackground = GetSysColorBrush(COLOR_3DFACE);
    wc.lpfnWndProc   = WndProc;
    wc.hCursor       = LoadCursor(0, IDC_ARROW);

    RegisterClassW(&wc);
    CreateWindowW(wc.lpszClassName, L"Center",
                  WS_OVERLAPPEDWINDOW | WS_VISIBLE,
                  100, 100, 250, 150, 0, 0, hInstance, 0);

    while (GetMessage(&msg, NULL, 0, 0)) {

        TranslateMessage(&msg);
        DispatchMessage(&msg);
    }

    return (int) msg.wParam;
}

LRESULT CALLBACK WndProc(HWND hwnd, UINT msg,
    WPARAM wParam, LPARAM lParam) {

    switch(msg) {

        case WM_CREATE:

            CenterWindow(hwnd);
            break;

        case WM_DESTROY:

            PostQuitMessage(0);
            break;
    }

    return DefWindowProcW(hwnd, msg, wParam, lParam);
}

void CenterWindow(HWND hwnd) {

    RECT rc = {0};

    GetWindowRect(hwnd, &rc);
    int win_w = rc.right - rc.left;
    int win_h = rc.bottom - rc.top;

    int screen_w = GetSystemMetrics(SM_CXSCREEN);
    int screen_h = GetSystemMetrics(SM_CYSCREEN);

    SetWindowPos(hwnd, HWND_TOP, (screen_w - win_w)/2,
        (screen_h - win_h)/2, 0, 0, SWP_NOSIZE);
}
In order to center a window on the screen, we need to have the dimensions of the window and of the screen.
case WM_CREATE:

    CenterWindow(hwnd);
    break;
We call the user defined CenterWindow function during the
WM_CREATE message.
GetWindowRect(hwnd, &rc) ;
With the GetWindowRect function, we retrieve the dimensions of
the bounding rectangle of the specified window.
int win_w = rc.right - rc.left;
int win_h = rc.bottom - rc.top;
The window width and height are computed.
int screen_w = GetSystemMetrics(SM_CXSCREEN)
int screen_h = GetSystemMetrics(SM_CYSCREEN);
With the GetSystemMetrics function,
we determine the screen width and height.
SetWindowPos(hwnd, HWND_TOP, (screen_w - win_w)/2,
    (screen_h - win_h)/2, 0, 0, SWP_NOSIZE);
We use the SetWindowPos function to position
the application window in the center of the screen.
Hot key
In the following example we show how to register a hot key. A hot key
is a key combination for executing a specific action. A hot key
is registered with the RegisterHotKey function.
BOOL WINAPI RegisterHotKey(HWND hWnd, int id, UINT fsModifiers, UINT vk);
The first parameter is a handle to the window that will receive
the WM_HOTKEY message generated by the hot key. The
second parameter is the ID of the hot key. The third parameter consists of
modifiers; keys that must be pressed in combination with the key
specified by the vk parameter in order to generate the
WM_HOTKEY message. Examples of modifiers include
MOD_ALT or MOD_CONTROL. The last parameter
is the virtual key code of the hot key.
#include <windows.h>

LRESULT CALLBACK WndProc(HWND, UINT, WPARAM, LPARAM);
void CenterWindow(HWND);

#define ID_HOTKEY 1

int WINAPI wWinMain(HINSTANCE hInstance, HINSTANCE hPrevInstance,
                    PWSTR lpCmdLine, int nCmdShow) {

    HWND hwnd;
    MSG  msg;
    WNDCLASSW wc = {0};
    wc.lpszClassName = L"Application";
    wc.hInstance     = hInstance;
    wc.hbrBackground = GetSysColorBrush(COLOR_3DFACE);
    wc.lpfnWndProc   = WndProc;
    wc.hCursor       = LoadCursor(0, IDC_ARROW);

    RegisterClassW(&wc);
    hwnd = CreateWindowW(wc.lpszClassName, L"Hot key",
                  WS_OVERLAPPEDWINDOW | WS_VISIBLE,
                  100, 100, 270, 170, 0, 0, 0, 0);

    while (GetMessage(&msg, NULL, 0, 0)) {

        TranslateMessage(&msg);
        DispatchMessage(&msg);
    }

    return (int) msg.wParam;
}

LRESULT CALLBACK WndProc(HWND hwnd, UINT msg,
        WPARAM wParam, LPARAM lParam) {

    switch(msg) {

        case WM_CREATE:

              RegisterHotKey(hwnd, ID_HOTKEY, MOD_CONTROL, 0x43);
              break;

        case WM_HOTKEY:

            if ((wParam) == ID_HOTKEY) {

                CenterWindow(hwnd);
            }

            break;

        case WM_DESTROY:

            UnregisterHotKey(hwnd, ID_HOTKEY);
            PostQuitMessage(0);
            break;
    }

    return DefWindowProcW(hwnd, msg, wParam, lParam);
}

void CenterWindow(HWND hwnd) {

    RECT rc = {0};

    GetWindowRect(hwnd, &rc);
    int win_w = rc.right - rc.left;
    int win_h = rc.bottom - rc.top;

    int screen_w = GetSystemMetrics(SM_CXSCREEN);
    int screen_h = GetSystemMetrics(SM_CYSCREEN);

    SetWindowPos(hwnd, HWND_TOP, (screen_w - win_w)/2,
        (screen_h - win_h)/2, 0, 0, SWP_NOSIZE);
}
In the example we register a Ctrl + C hot key. It centers the window on the screen.
case WM_CREATE:

      RegisterHotKey(hwnd, ID_HOTKEY, MOD_CONTROL, 0x43);
      break;
During the creation of the window, we register the
Ctrl + C hot key with the RegisterHotKey
function.
case WM_HOTKEY:

    if ((wParam) == ID_HOTKEY) {

        CenterWindow(hwnd);
    }

    break;
A WM_HOTKEY message is generated when invoking the
hot key. We identify our hot key by examining the wParam
parameter and call the CenterWindow function.
case WM_DESTROY:

    UnregisterHotKey(hwnd, ID_HOTKEY);
    PostQuitMessage(0);
    break;
When the window is destroyed, we unregister the hot key
with the UnregisterHotKey function. The MSDN is not
clear about whether it is compulsory to call this function.
More windows
A window is created from a specific window class. A window class defines a set
of behaviours that several windows have in common. Some classes are
already predefined in the system. A custom window class must be registered.
After that, we can create windows of this new window class. A window is
created using the CreateWindowW function. Its first
parameter is the window class name.
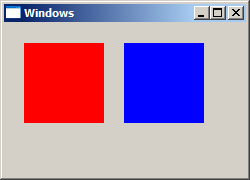
Each window has a window procedure. It is a function that is called by the OS when users interact with the window. In the following example, we create three windows: one parent window and two child windows.
#include <windows.h>

LRESULT CALLBACK WndProc(HWND, UINT, WPARAM, LPARAM);
LRESULT CALLBACK PanelProc(HWND, UINT, WPARAM, LPARAM);

void RegisterRedPanelClass(void);
void RegisterBluePanelClass(void);


int WINAPI wWinMain(HINSTANCE hInstance, HINSTANCE hPrevInstance,
                    PWSTR lpCmdLine, int nCmdShow) {
    MSG  msg;
    WNDCLASSW wc = {0};
    wc.lpszClassName = L"Windows";
    wc.hInstance     = hInstance;
    wc.hbrBackground = GetSysColorBrush(COLOR_3DFACE);
    wc.lpfnWndProc   = WndProc;
    wc.hCursor       = LoadCursor(0, IDC_ARROW);

    RegisterClassW(&wc);
    CreateWindowW(wc.lpszClassName, L"Windows",
                  WS_OVERLAPPEDWINDOW | WS_VISIBLE,
                  100, 100, 250, 180, 0, 0, hInstance, 0);

    while (GetMessage(&msg, NULL, 0, 0)) {

        TranslateMessage(&msg);
        DispatchMessage(&msg);
    }

    return (int) msg.wParam;
}

LRESULT CALLBACK WndProc(HWND hwnd, UINT msg,
    WPARAM wParam, LPARAM lParam) {

    switch(msg) {

        case WM_CREATE:

            RegisterRedPanelClass();

            CreateWindowW(L"RedPanelClass", NULL,
                          WS_CHILD | WS_VISIBLE,
                          20, 20, 80, 80,
                          hwnd, (HMENU) 1, NULL, NULL);

            RegisterBluePanelClass();

            CreateWindowW(L"BluePanelClass", NULL,
                          WS_CHILD | WS_VISIBLE,
                          120, 20, 80, 80,
                          hwnd, (HMENU) 2, NULL, NULL);
            break;

        case WM_DESTROY:

            PostQuitMessage(0);
            return 0;
    }

    return DefWindowProcW(hwnd, msg, wParam, lParam);
}

LRESULT CALLBACK PanelProc(HWND hwnd, UINT msg,
    WPARAM wParam, LPARAM lParam) {

    switch(msg) {

        case WM_LBUTTONUP:

            MessageBeep(MB_OK);
            break;
    }

    return DefWindowProcW(hwnd, msg, wParam, lParam);
}

void RegisterRedPanelClass(void) {

    HBRUSH hbrush = CreateSolidBrush(RGB(255, 0, 0));

    WNDCLASSW rwc = {0};

    rwc.lpszClassName = L"RedPanelClass";
    rwc.hbrBackground = hbrush;
    rwc.lpfnWndProc   = PanelProc;
    rwc.hCursor       = LoadCursor(0, IDC_ARROW);
    RegisterClassW(&rwc);
}

void RegisterBluePanelClass(void) {

    HBRUSH hbrush = CreateSolidBrush(RGB(0, 0, 255));

    WNDCLASSW rwc = {0};

    rwc.lpszClassName = L"BluePanelClass";
    rwc.hbrBackground = hbrush;
    rwc.lpfnWndProc   = PanelProc;
    rwc.hCursor       = LoadCursor(0, IDC_ARROW);

    RegisterClassW(&rwc);
}
We have an application window with two child windows. The two child windows have blue and red backgrounds.
HBRUSH hbrush = CreateSolidBrush(RGB(255, 0, 0));
...
rwc.hbrBackground = hbrush;
To create a coloured window background, we create a custom solid brush by
calling the CreateSolidBrush function. To specify a colour, we
use the RGB macro. As we know, any colour can be created by combining red,
green, and blue colours. Then we set the hbrBackground parameter of
the window class structure to this newly created brush.
RegisterRedPanelClass();

CreateWindowW(L"RedPanelClass", NULL,
                WS_CHILD | WS_VISIBLE,
                20, 20, 80, 80,
                hwnd, (HMENU) 1, NULL, NULL);
First we register a new window class. After this step, we create a window of this class.
Both of our child windows share the PanelProc window procedure.
This procedure is called by the Windows OS when we interact with it.
case WM_LBUTTONUP:

    MessageBeep(MB_OK);
    break;
We interact with our child windows, when we click on them. By left clicking
on the child window, the Windows OS calls the child window procedure and sends a
WM_LBUTTONUP message. In our example, we call the
MessageBeep function. If we left click on the background of the two
child windows, we hear the Windows default beep sound.
void RegisterBluePanelClass(void) {

    HBRUSH hbrush = CreateSolidBrush(RGB(0, 0, 255));

    WNDCLASSW rwc = {0};

    rwc.lpszClassName = L"BluePanelClass";
    rwc.hbrBackground = hbrush;
    rwc.lpfnWndProc   = PanelProc;
    rwc.hCursor       = LoadCursor(0, IDC_ARROW);

    RegisterClassW(&rwc);
}
This function registers a new window class. Windows of this window class type have red backgrounds. The edit, button, and static controls are created from predefined window classes, which are already available to all processes. So in these cases we do not need to register a window class for them.
The escape key
Applications are often terminated by pressing the Escape key. A message box is also shown to confirm the termination.
#include <windows.h>

LRESULT CALLBACK WndProc(HWND, UINT, WPARAM, LPARAM);


int WINAPI wWinMain(HINSTANCE hInstance, HINSTANCE hPrevInstance,
                    PWSTR pCmdLine, int CmdShow) {

    MSG  msg;
    WNDCLASSW wc = {0};
    wc.lpszClassName = L"Escape";
    wc.hInstance     = hInstance;
    wc.hbrBackground = GetSysColorBrush(COLOR_3DFACE);
    wc.lpfnWndProc   = WndProc;
    wc.hCursor       = LoadCursor(0, IDC_ARROW);

    RegisterClassW(&wc);
    CreateWindowW(wc.lpszClassName, L"Escape",
                  WS_OVERLAPPEDWINDOW | WS_VISIBLE,
                  100, 100, 250, 180, 0, 0, hInstance, 0);

  while (GetMessage(&msg, NULL, 0, 0)) {

      TranslateMessage(&msg);
      DispatchMessage(&msg);
  }

  return (int) msg.wParam;
}

LRESULT CALLBACK WndProc(HWND hwnd, UINT msg,
    WPARAM wParam, LPARAM lParam) {

    switch(msg) {

        case WM_KEYDOWN:

            if (wParam == VK_ESCAPE) {

                int ret = MessageBoxW(hwnd, L"Are you sure to quit?",
                                  L"Message", MB_OKCANCEL);

                if (ret == IDOK) {

                    SendMessage(hwnd, WM_CLOSE, 0, 0);
                }
             }

             break;

        case WM_DESTROY:

            PostQuitMessage(0);
            break;
    }

    return DefWindowProcW(hwnd, msg, wParam, lParam);
}
It is a common practice to ask a user if he really wants to close an application. If we have a clock or a calculator then it does not matter that much. But if we have a text editor or a drawing application, it does matter. We might accidentally press the Escape key and loose all our modifications.
case WM_KEYDOWN:

    if (wParam == VK_ESCAPE) {

        int ret = MessageBoxW(hwnd, L"Are you sure to quit?",
                            L"Message", MB_OKCANCEL);

        if (ret == IDOK) {

            SendMessage(hwnd, WM_CLOSE, 0, 0);
        }
    }

    break;
If we press a key, the window procedure receives a WM_KEYDOWN
message. The wParam parameter has a key code. We can close the
window by sending a WM_CLOSE message. The message is sent
with the SendMessage function.
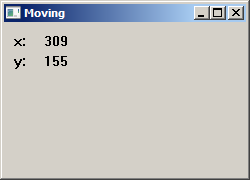
Moving a window
When we move a window on the screen, the window procedure receives the
WM_MOVE message. In our example we display the current window
position on the screen—we display the coordinates of the top-left corner
of the window.
#include <windows.h>
#include <wchar.h>

LRESULT CALLBACK WndProc(HWND, UINT, WPARAM, LPARAM);
void CreateLabels(HWND);

HWND hwndSta1;
HWND hwndSta2;

int WINAPI wWinMain(HINSTANCE hInstance, HINSTANCE hPrevInstance,
                    PWSTR pCmdLine, int CmdShow) {
    HWND hwnd;
    MSG  msg;

    WNDCLASSW wc = {0};
    wc.lpszClassName = L"Moving";
    wc.hInstance     = hInstance ;
    wc.hbrBackground = GetSysColorBrush(COLOR_3DFACE);
    wc.lpfnWndProc   = WndProc;
    wc.hCursor       = LoadCursor(0, IDC_ARROW);

    RegisterClassW(&wc);
    hwnd = CreateWindowW(wc.lpszClassName, L"Moving",
                         WS_OVERLAPPEDWINDOW | WS_VISIBLE,
                         150, 150, 250, 180, 0, 0, hInstance, 0);

    while(GetMessage(&msg, NULL, 0, 0)) {

        TranslateMessage(&msg);
        DispatchMessage(&msg);
    }

    return (int) msg.wParam;
}

LRESULT CALLBACK WndProc(HWND hwnd, UINT msg,
    WPARAM wParam, LPARAM lParam) {

    wchar_t buf[10];
    RECT rect;

    switch(msg) {

      case WM_CREATE:

        CreateLabels(hwnd);
        break;

      case WM_MOVE:

        GetWindowRect(hwnd, &rect);

        StringCbPrintfW(buf, BUF_LEN, L"%ld", rect.left);
        SetWindowTextW(hwndSta1, buf);

        StringCbPrintfW(buf, BUF_LEN, L"%ld", rect.top);
        SetWindowTextW(hwndSta2, buf);

        break;

      case WM_DESTROY:

        PostQuitMessage(0);
        break;
    }

    return DefWindowProcW(hwnd, msg, wParam, lParam);
}

void CreateLabels(HWND hwnd) {

    CreateWindowW(L"static", L"x: ",
        WS_CHILD | WS_VISIBLE,
        10, 10, 25, 25,
        hwnd, (HMENU) 1, NULL, NULL);

    hwndSta1 = CreateWindowW(L"static", L"150",
        WS_CHILD | WS_VISIBLE,
        40, 10, 55, 25,
       hwnd, (HMENU) 2, NULL, NULL);

    CreateWindowW(L"static", L"y: ",
        WS_CHILD | WS_VISIBLE,
        10, 30, 25, 25,
        hwnd, (HMENU) 3, NULL, NULL);

    hwndSta2 = CreateWindowW(L"static", L"150",
        WS_CHILD | WS_VISIBLE,
        40, 30, 55, 25,
        hwnd, (HMENU) 4, NULL, NULL);
}
The creation of the static text controls is delegated
to the CreateLabels function.
void CreateLabels(HWND hwnd) {

    CreateWindowW(L"static", L"x: ",
        WS_CHILD | WS_VISIBLE,
        10, 10, 25, 25,
        hwnd, (HMENU) 1, NULL, NULL);

    hwndSta1 = CreateWindowW(L"static", L"150",
        WS_CHILD | WS_VISIBLE,
        40, 10, 55, 25,
       hwnd, (HMENU) 2, NULL, NULL);

    CreateWindowW(L"static", L"y: ",
        WS_CHILD | WS_VISIBLE,
        10, 30, 25, 25,
        hwnd, (HMENU) 3, NULL, NULL);

    hwndSta2 = CreateWindowW(L"static", L"150",
        WS_CHILD | WS_VISIBLE,
        40, 30, 55, 25,
        hwnd, (HMENU) 4, NULL, NULL);
}
There are four static text controls. Two of them change during the lifetime of the application. So we need only two handles.
case WM_MOVE:

  GetWindowRect(hwnd, &rect);

  StringCbPrintfW(buf, BUF_LEN, L"%ld", rect.left);
  SetWindowTextW(hwndSta1, buf);

  StringCbPrintfW(buf, BUF_LEN, L"%ld", rect.top);
  SetWindowTextW(hwndSta2, buf);

  break;
To get the window coordinates, we call the GetWindowRect function.
Since a coordinate is a number, we must convert it to a string. To
accomplish this, we use the StringCbPrintfW function.
Flashing a window
Sometimes when an important event happens, the title bar or the taskbar button start to flash. The flashing is the change of the title bar from inactive status to active status and vice versa. This is a common feature in Miranda IM when we receive a new message.
#include <windows.h>

LRESULT CALLBACK WndProc(HWND, UINT, WPARAM, LPARAM);


int WINAPI wWinMain(HINSTANCE hInstance, HINSTANCE hPrevInstance,
                    PWSTR lpCmdLine, int nCmdShow) {
    MSG  msg;
    WNDCLASSW wc = {0};
    wc.lpszClassName = L"Flash";
    wc.hInstance     = hInstance;
    wc.hbrBackground = GetSysColorBrush(COLOR_3DFACE);
    wc.lpfnWndProc   = WndProc;
    wc.hCursor       = LoadCursor(0,IDC_ARROW);

    RegisterClassW(&wc);
    CreateWindowW(wc.lpszClassName, L"Flash",
                 WS_OVERLAPPEDWINDOW | WS_VISIBLE,
                 100, 100, 250, 180, 0, 0, hInstance, 0);

    while(GetMessage(&msg, NULL, 0, 0)) {

      TranslateMessage(&msg);
      DispatchMessage(&msg);
    }

   return (int) msg.wParam;
}

LRESULT CALLBACK WndProc(HWND hwnd, UINT msg,
    WPARAM wParam, LPARAM lParam) {

    FLASHWINFO fwi;

    switch(msg)  {

      case WM_CREATE:

          CreateWindowW(L"Button", L"Flash",
                  WS_CHILD | WS_VISIBLE,
                  10, 10, 80, 25,
                  hwnd, (HMENU) 1, NULL, NULL);
          break;

      case WM_COMMAND:

          fwi.cbSize = sizeof(fwi);
          fwi.dwFlags = FLASHW_ALL;
          fwi.dwTimeout = 0;
          fwi.hwnd = hwnd;
          fwi.uCount = 4;

          FlashWindowEx(&fwi);
          break;

      case WM_DESTROY:

          PostQuitMessage(0);
          break;
    }

    return DefWindowProcW(hwnd, msg, wParam, lParam);
}
In order to flash a window, we must do two steps: create and fill
a FLASHWINFO structure and call the FlashWindowEx
function.
fwi.dwFlags = FLASHW_ALL;
We have set the FLASHW_ALL flag. This will flash both the title
bar and the taskbar button. To flash only the titlebar, we can use the
FLASHW_CAPTION tag. To flash the taskbar button, we can use the
FLASHW_TRAY flag.
fwi.dwTimeout = 0;
The dwTimeout member is the rate at which the window is to be
flashed, in milliseconds. If dwTimeout is zero, the function uses
the default cursor blink rate.
fwi.hwnd = hwnd;
fwi.uCount = 4;
Here we set which window to flash and how many times we want to flash it. In our case, we flash the main window four times.
FlashWindowEx(&fwi);
The FlashWindowEx starts the flashing.
In this part of the Windows API tutorial, we have created some simple UI examples.